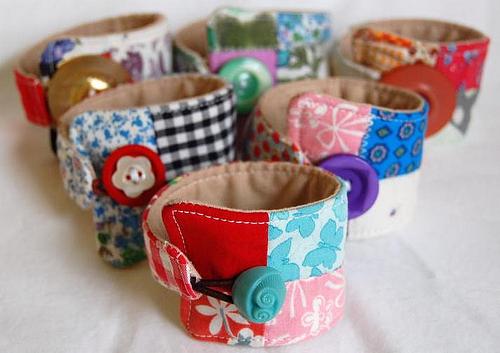
A creative mess is better than tidy idleness. ~Author Unknown
Any day spent sewing, is a good day. ~Author Unknown
I love sewing and have plenty of material witnesses. ~Author Unknown

Monday, January 21, 2013

Crib Sheets


I know, it's been a long time and I'm sorry.  I really haven't been crafting much.  Yes, blasphemy.  Haha...  Life has really been taking some interesting twist and turns over the last three months.  We decided to become foster parents, but happened to get a bad agency where the director was really off his rocker. =(  I'll spare you the drama.  I spoke with a new agency a couple weeks ago and they seem sooooo much better.  Moving on...  Our area has a high demand for newborn foster homes so bring back that crib!

Instead of going with the boring or pricey crib sheets out there I decided to make one of my own.  My daughter had an animal/Noah's Ark themed nursery so this one will run right along that line.  I came across a tutorial on Dana Made It first and have since seen a couple other patterns.  I basically followed her pattern with only a few tweaks.  I used two yards of prewashed fabric and began with 80" of 1/4" elastic.  I folded my fabric into 4ths and cut it at 33.5" across the top raw edge.  The salvage side didn't meet the 22.5" requirement so I didn't cut it; it was actually 21".  Although I was slightly short on the width it wasn't a problem in the end and the bonus was me not having to hem the edge.  With my fabric still folded in 4ths I cut an 8"x8" square out of the non folded corner.  If you see Dana's tutorial you will see just what I mean.

After sewing up the corners just as she instructed I zigzag stitched my short ends to keep them from fraying.  Remember they are the only cut portion besides the four corners which I also zigzag stitched after sewing those seams together.  If you've never done this here's all I do...  I make my stitches closer together then the average zigzag stitch.  On my sewing machine it's 2.5.  When the needle goes to the left it hits fabric and to the right I let if "fall off" the fabric.  It causes it to slightly roll the fabric and keep it from fraying.


Alright now for my questions from all the tutorial's I saw.  How much fabric is left to fold under the mattress?  First off let me say, I bought this mattress in January 2009 from Walmart.  It is a standard American crib mattress.  After sewing the corners together and finishing the raw edges with the zigzag stitch I put the sheet on to see if it will actually fit. 

The sides had 2.5" to wrap under.
The ends had 3" to wrap under.  I find the difference only being .5" interesting seeing how the sides are each 1.25" (counting hem) short of the pattern.
 
What does the bottom of the mattress look like with the sheet on?  Am I the only one who thought that?
Do I really need 80" of elastic?
I didn't want there to be a mishap on my sheet's watch so I measured my elastic, but didn't cut it.  I marked it at 72" and 80".  After running the elastic through which let me say was a task, I put it on the mattress and tightened it until I felt it held well.  I ended up taking off 14".  So 60" is what I used.  Also, I overlapped my ends 1" when sewing them together.  Which brings me to another question...
 
How much do I turn the fabric under for the elastic casing?
I turned my under 5/8" and sewed it at 1/4".  Normally I would have only turned it under 1/2" and sewed it at 1/8", but I wanted more room for error.


In the end, I love the results.  Now I need to go make a flower sheet for my mom's foster daughter.
 
Dana, thanks for the fun tutorial!


Wednesday, January 9, 2013

Some new tutorials for you !!!

The first tutorial of this year is ready on my blog and I start with the topic of
recycling, reusing and repurposing. If there are between you who are interested in
this subject, in my tutorial I show how I made to transform a pair of jeans in a
handy needlecase.
This is the front of my needle case
 
 and the back
 
 
Here is the link where you can find the tutorial.
 
I've also done other tutorials, such as how to make this  this scarf using water
soluble stabilizer, yarns and threads and the tutorial where I show how to make
this scarf is here.


Another project I've done is this wine gift bag.
 

These are are bags to carry bottles of wine, my idea is to use them when we go to
dinner or lunch at the house of friends, and want to offer as a gift something more
than just wine.
I did a tutorial and here is the link.


Hopefully you will enjoy these projects, since January just begun, I wish you all a
happy year 2013 full of creativity.
Marisa.

Thursday, January 3, 2013

Monday, December 31, 2012

Happy New Year

Hello sweet Ladies and Gents... I just wanted to give you the link to my blog. I posted about some fun projects that were made for the family. Other than that...........


Saturday, December 8, 2012

Blogged at AuntPIttyPats

I have blogged about some fun and exciting ideas to make for friends and family,
 for the Holiday Season 
at AuntPittyPats blog ;O)
Here is one of the project ideas.....JCasa


Monday, October 1, 2012

LEAFS ME HAPPY Blog Hop Day One...


Today is the first day of the hop and 11 quilters will be posting their leaf-themed blocks. Cheerleader and hostess Cherry, at CherryBlossoms Studio, has all the info. Visit her to see the schedule on her sidebar and get ready for a fun trip. The blog hop goes from October 1-10. Today's bloggers are:


I'll be blogging on Day Five of the hop--the first one I've ever done--so I'm nervous and excited at the same time.  Make sure you visit all of these wonderful bloggers and see their terrific blocks and projects. Some have tutorials and giveaways, too.   

Sharon Z
Quilting with a Marmalade Cat
 http://quiltingwithamarmaladecat.blogspot.com

Friday, September 21, 2012

A Project from my newest Tilda book.

I recently received my latest Tilda book and fell in love with the Cup Cake Fairies. All the things I needed to make one were on hand (have been internet shopping lately) and it really didn't take that long to make.

Did have a little trouble with the hair...........don't quite have the knack of it yet.............means I will have to make a few more, and I thought I had matched up the thread for the fringe but it was a little darker when sewn ! I didn't put the wings on either.


Don't you just love the buttons? They are really brads! I couldn't find any beads in the colour I wanted so looked in my scrap-book supplies and what do you know! I think they are perfect.

With my recent stay in hospital I decided I needed a bag for my slippers. A plastic bag just doesn't cut it and I made one from some fabric I recently found in Spotlight. It's not slippers but rain boots.......still it's shoes! It was quick and easy to make and I will be able to pop in a pair of slippers (or shoes when on holidays) the next time they are needed.


 You can visit my blog here to see what else I have been getting up to.
Cheers
Heather :)

Monday, September 17, 2012

Let's sew a textile cuff using a pair of old jeans.

Hi I just did an update on my blog, this time I decided to recycle old scraps of
jeans and create a textile cuff.
I added scraps of fabrics and also some jewelry. I decided to take out of the closet my embellisher machine, and use it to blend the fabrics.


 If you have a minute, I invite you to visit my blog, hope you like my new tutorial. Here I show you some pictures of my textile cuff.


I hope you have a minute and you come to visit my blog to see the tutorial.
Have a nice day!
Marisa.

Wednesday, September 5, 2012

I have to confess that for quite a certain time, I'm thinking of making covers for my pillowcase, I think it's a way to customize the decoration of a room.
The technique that I will use  to perform them, is called, the technique of the sausage pillowcase, and when you'll see the pictures then you will understand why it is called so.
These cases are sewn in a couple of hours, what actually took me longer was choosing the fabrics....


What is special about this type of case, is that when you finish it, we will not see any seams inside. To me this is magic, when I discovered this technique, I said to myself that I had to try to make a couple of them and see the result, I checked and I can confirm, when you finish the pillowcase, the seams are not seen and especially, these covers are beautiful!

I invite you to visit my blog to read the tutorial, I warn you that I have many pictures and I think it's pretty clear to understand. At least that's what I've tried.
 
I want to show some pictures


The link to my blog is here
 
 I hope you will enjoy this tutorial
Marisa