A creative mess is better than tidy idleness. ~Author Unknown
Any day spent sewing, is a good day. ~Author Unknown
I love sewing and have plenty of material witnesses. ~Author Unknown
Showing posts with label Projects. Show all posts

Wednesday, July 14, 2010

Greetings from Down Under...

Greetings from south-east Australia...where tonight it is cold and wet, very cold and wet...

I've been meaning to post this for a couple of weeks but you know how it is...best intentions and all that...anyhow...this is a table runner which I started back at the beginning of February and finally finished at the beginning of July...


My own design using a traditional block - Eight Hands Around - it is destined as a present for my SIL.

Enjoying seeing everyone's projects.

Happy Stitching...

Sunday, July 11, 2010

Pretty Pockets and a Crocheted Hanger

I got this idea from Jessica at Kids Napping, I'm Scrapping! I made this for a wedding gift, it didn't turn out quite as nice as I wanted, but, oh well.

I crocheted a cover for the hanger and a flower that I added to the middle.


This is the Pretty Pockets. It is made out of linen with a piece of peach lace over it and then I attached the pockets and ribbon. I made some lace yo-yo's and then put some stuff in the pockets. I thought she could hang it on the back of the bathroom door or her bedroom door and put some of her things in it.


Wednesday, July 7, 2010

Sweet Dreams


Howdy, I"m Sue from Country Pleasures blog and my sweet friend Cathy invited me to this sweet site! Even though I'm no young thing, I am re-learning the art of sewing, just a beginner with a advance mind of too many wants and ideas to keep up with. I"m still working on my first apron, got all the way to the waist band only to find out I did that wrong so now I've got to figure out how to attach it so it looks like I did it right? Anyhoo, my next obsession is these adorable rag bags. I recently bought one, and thought for $20, I could make one, or at least try too? So, now I want one in fall and Christmas themed fabric and thanks to Cathy for helping my find a free pattern, I"m well on my way to another challenge, after I finish the apron that is! Looking forward to getting to know all of you and learning along the way!

Friday, July 2, 2010

July Is Here Already??

Well, I don't know about you, but for me it seems like the summer is going awful fast!
I wanted to share a few of the sewing projects I have finished up on ~
This is a Sunflower Tote Bag I made for an order. It was sooo fun to make, because I ♥LOVE♥ SUNFLOWERS, but it was sooo hard to mail away! lol!!
And I got one more of my PIF aprons done and shipped out.
Fun! you know how much I ♥LOVE♥ RED :)
I'm kinda stuck on these "lil' yoyo & button accent thingies"
Too cute!♥♥ lol!!

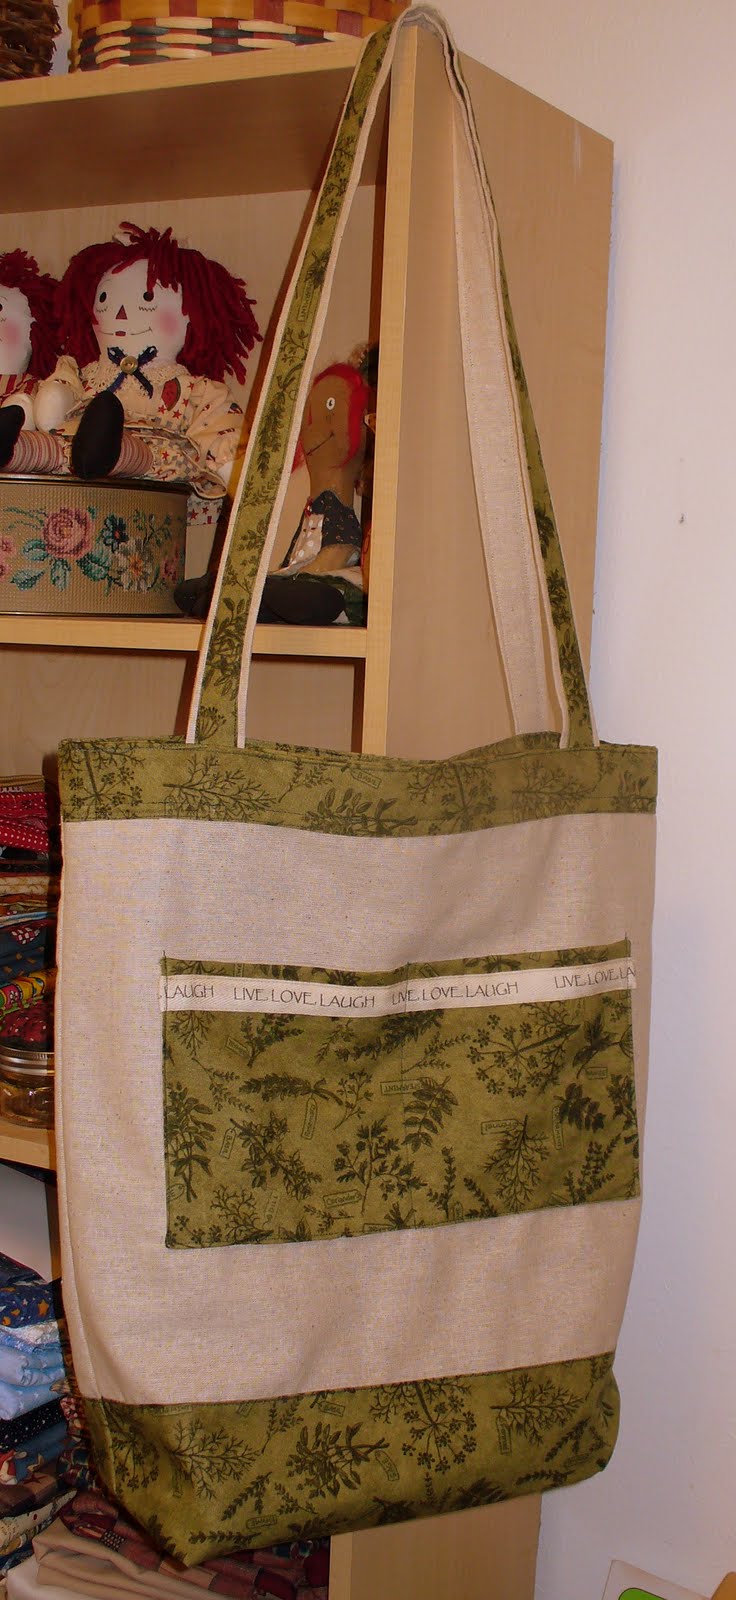
and this Herbal Themed Tote Bag I made for a herb loving friend :)

I am really enjoying all the posts here!
Keep em coming!! :)

Hugz to all,
CJ ♥♥

Monday, June 28, 2010

CLOTHES PIN HOLDER

I am Barb from Bejeweled Quilts, living in Amerika Samoa at the moment.

Most people in Amerika Samoa hang out their clothes, electricity is so expensive here and it is usually hot enough to dry them quickly.

So a friend asked if I would make her a clothes pin holder. I gave it a thought or two for a few days and so today, I just started cutting...no pattern....

and this is what I got...


The first picture is for when she is not using the clothes pins...

This next one, I just put a button in the back so the bag gaps open so she has easy access to the pins.


This is the back of the bag.


Of course, it will be on the clothes line and not a hanger.

I guess I could have gone online and found a fun pattern but living here in the salt air, I wanted something durable for her and this denim fabric seamed to fit the bill.

Thanks Aunt Pitty Pat for inviting me to be apart of this community of bloggers.

Thursday, June 24, 2010

Gnomes


I belong to a swap group that swaps ornaments each month based on a Year of Enchantment theme. This month's theme is Gnomes. These are some of the projects I have been working on. My partner has one of those silver travel trailers that she calls The Gnome Dome so I thought a felt gnome wall hanging might be fun to hang inside.

Wednesday, June 23, 2010

Leggings or Leg Warmer Tutorial

Summer has just begun, but for us who sew it's time to start preparing for the next school year. Perhaps you don't have a young daughter, granddaughter, niece or friends child in your life; maybe you know of someone who’s pregnant or has a new baby. Leg warmers are great for both genders when they’re learning to crawl; they're wonderful for protecting the knees. They’re also great for under dresses as the weather gets cooler. I know for those of us in the south “cooler” isn’t a word right now; can you say blazing heat? Do we really get used to breathing in the moist HOT air? What about frying eggs on the sidewalk? Sorry, rabbit trail! In the south we not only have HOT summers, but we can have mild winters too. So under all those cute handmade dresses my daughter will be wearing to K3 she will have on leggings. The great thing about leggings is she can wear them in the morning then take them off in the afternoon when it warms up.

Leggings are easy and cheap to make. All you need is tall women’s socks, some thread, and about 15 minutes (for the first pair). By the way, I used 1/4" seams and zig-zag stitched.

Pick your color and make sure they are tall socks. I bought these recently on clearance at Target for $1.
Cut the foot off the socks right above the heel. It's okay if it's already flaring where you cut; because it's knit it won't show.

Cut a section out of the foot portion 5"x 2.5" on fold. You will end up with a rough 5" square; these will be your cuffs. Note, I typically cut this from the bottom of the foot, but these socks really slanted so I went from the top.

Fold the cuffs so that the pattern of the leggings match the cuffs. I've messed this one up a few times so make sure it's how you like it.

The top cuff is still showing the direction I want it when it's on the legging. On the bottom cuff I opened it up leaving Top A up and folding the sides together. Zig-zag stitch down "sides" creating a tube.

Turn the cuff in half so that Top A & B are up and the wrong side of fabric is together. Sorry, the it's blurry!

Save your sanity and zig-zag stitch the two raw edges together. I've made the leggings without doing this and it's a pain; not to mention time consuming.
Also, (hehehe) the loop is so small make sure you don't catch the top in the portion you are sewing. I'm not saying I did it or anything (guilty look), but if one should catch even a little bit of the top you might just have to take the foot off the sewing machine to then clip the fabric.


Slip the cuff over the legging matching the seam up with one of the pressed sides of the legging. The cuff will be smaller then the legging so you must stretch it out to pin it down; you must also do this when zig-zag stitching them together.

Your finished!

Here she is at 1.5 years old wearing her leggings. As you can see she wasn't a very willing model; she was taking them off.


These are also great for travel! We were driving from England to Germany when at one gas stop we realized the temperature had dropped. We slipped the leggings on her and she was good to go. She was 1.5 years old in the photo wearing a pair of white leggings. She still wears both pairs of leggings at 3.5 years old. I've read they can wear them until they're about 7.

Wednesday, June 16, 2010

Preschool Backpack

After all the debating of home, private, or public school we finally enrolled our daughter at the local private school in K3. She will be going three half days a week. I was told she would have to take a backpack each day big enough to hold a folder (not rolled). They said the only time she is guaranteed to bring something home is Wednesday when she brings her folder home. A quick measurement showed that her Walmart backpack was to small. After a bit of debating and internet searching I starting finding toadstool backpacks. They were really cute. Apparently the pattern is in some book that cost almost $40. I was hoping to find a tutorial for something like it, but struck out. What I did learn was that it is to small for a folder. So after a bit of measuring, rounding corners, and debating straps I finally came up with this.
When I had it all Wonder Under(ed) on and blanket stitched down I was honestly impressed with how much it looked like the other backpacks I saw.


Size was an issue for me. Fine it fits a fold, but is that all I want it used for? I put a lot of work in it and wanted it to be a bit thicker then a folder. The backpacks I found online had the front and back pieces sewn together. I added a side/bottom strip to make it wide enough to hold a change of clothes (remember she's three and still has accidents), snack, cup or whatever else she might want to put in it. The line you see above the magnetic closure is the name strip. I'll never try it again (maybe I will), but I cut out teeny tiny letters and ironed them on. It was to small to sew around so I put no-fray over them and now I'm holding my breath they still look good by next year. **Don't mind the vet records. It was the only folder I could find. It would have helped if I found it before cutting the bag out; I played the guessing game on size.**


And here it is in action. The one thing I'm going to change is the strap length. They need about 5" taken off.

My daughter's turned out so well I actually made a second to sell on Etsy. I'm such a slacker though; I haven't put the lining in it yet. I guess the bonus to slacking off is easier access to the straps to shorten them the 5" like I'm going to do with my daughter's.